
Hey guys, it’s parson! Whether you’re new to the smash scene, or you are a returning player from older games in the smash series, there are a lot of jargon that may go over your head. Hopefully this guide clears some of that up.
A reminder that nothing on this blog is static, I will always be updating these guides and adding terms and explanations as I come across ones I may have forgotten.
I will also further explain a lot of these terms in future posts!
That being said, let’s jump in-
Standard Jargon
Standard Attacks/Moves
- Jab (1, 2 3, Infinite): Standing attack combo. (A,A,A).
- Utilt, Ftilt, Dtilt: Up Tilt, Forward Tilt, Down Tilt (A+ slight use of the Control Stick).
- Nair, Fair, Bair, Dair, Uair, Zair: Neutral Air, Forward Air, Back Air, Down Air, Up Air, Grab in Air (while airborne, A alone for Nair, Z alone for Zair, with Control Stick for the rest).
- DA: Dash Attack (While dashing with the Control Stick, use A or the C-Stick).
- Usmash, Fsmash, Dsmash: Up Smash, Forward Smash, Down Smash. Can be charged! (A + Control Stick or C-Stick)
- Up-B, Side-B, Down-B, Neutral-B: Self explanatory, I hope! (B + direction on Control Stick)
- Grab: Exactly what you think. Counters Shields. (Z or L/R + A).
- Pummel: When grabbed, press A or Z to deal a little damage.
- Fthrow, Dthrow, Bthrow, Uthrow: Forward Throw, Down Throw, Back Throw, Up Throw. After a grab, throw someone with the Control Stick.
- Roll: Dodges to the left or right, with moments of invulnerability (L/R + left or right on the Control Stick).
- Spotdodge: A dodge in place. Makes you invulnerable for the duration of the dodge (L/R + down on the Control Stick).
- Airdodge: A dodge in the air. Makes you invulnerable for the duration of the dodge, but has landing lag if used above the ground (while airborne, press L/R).
- Shield: Protects from attacks. (L/R). You can position it by slightly moving (Control Stick).
Techniques and Terms
- Short Hop (SH): exactly what it sounds like. Performed by lightly tapping the jump (X, Y, or tapping the Control Stick upwards lightly!) button (yes, it CAN be done with Tap Jump!), your character will jump about half the height as they would with a Full Hop. Useful for using aerials on a standing character.
- Full Hop (FH): a regular jump.
- Fast Fall (FF): When airborne, tapping and holding the Control Stick downwards will initiate a fast-fall. All characters have different fast-fall speeds. Fast falling is a great way to regain stage control.
- Footstool: Jumping while on another character initiates a footstool, sending them downwards. Cannot be Teched (see below) on stage.
- Knockback: Can refer to a few things. A move’s Knockback determines how far a character is sent, while Knockback Angle determines what direction they will go. All characters have different amounts of knockback and unique knockback angles with each of their respective moves.
- Meteor Smash/Spike: Usually done with a character’s Dair, a spike is performed by knocking the opponent off of the bottom of the screen with an attack. A Meteor Effect is when a move has a knockback angle that aims downwards. Many moves have a meteor effect, let it be slight or extreme.
- Frame: can refer to a few things. First off, there are 60 frames every second. This is used as a unit of measure with various actions, such as attacking, or shielding. Each character has unique Frame Data for their set of moves (eg: Fox’s Grab initiates at frame 6 and is active until frame 7), while some actions have the same speed across every character (eg: Shielding comes out at frame 1).
- Patch: An update to the game. Currently the game is version 1.1.5.
- Nerf & Buff: Two antonyms. These are in reference to how characters change between patches. A nerf is a change that affects the character negatively, while a buff benefits them.
- Input: When the game registers a button press.
- Button Mashing: When Grabbed, or trapped in a move like Lucas’ PK Freeze or Yoshi’s Egg, you can minimize the amount of time you are locked into these moves by registering a lot of inputs, or Button Mashing.
- Stale: Moves become weaker with repeated use, reducing their knockback and damage output slightly with each use.
- Shield Break: When your shield depletes, you are put in a daze for a while. The time you are stunned depends on how much % you have accumulated, and how fast you mash buttons. Jigglypuff, however, dies instantly if you break her shield. How tragic.
- Stage Control: Exactly what it sounds like. Maintaining control of the stage is a crucial part of any character’s strategy. Gives you an advantage because you are on solid ground.
- Blast Zones: The areas off-screen where your character dies are known as the blast zones. Blast zones differ depending on the stage.
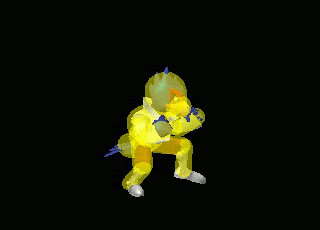
- Hitbox: Where a character’s moves hit. (Credit to Smashboards user Furil for the sweet visualization of Cloud’s Dair)

- Disjointed (Hitbox): A hitbox that extends beyond the character’s hurtbox (see below). Good examples are Marth’s sword, or Mewtwo’s tail.
- Sweetspot/Sourspot: Most hitboxes have a spot where the move deals more damage and knockback. This is known as the Sweetspot. A Sourspot deals less damage and less knockback. Sweetspots are good for killing, while Sweetspots are useful for comboing.
- Hurtbox: Where a character can get hurt. Using attacks and moving around changes the position and size your hurtboxes. This is a GIF from Melee, however the principle still applies to Smash 4. (Yellow represents the hurtbox, while red is the hitbox of Falco’s Jab Infinite)
- Hitstun: When a character is hit by an attack, there is a period of time where they cannot perform any action, this is known as hitstun. They are put in a “tumbling”animation, however when the hitstun is over, they will still be in this tumble animation until an input is registered.
- Tech: A Tech is preformed while in hitstun or during the Tumble Animation by pressing shield (L or R) as your character hits the ground or a wall. Initially the timing may be difficult, but is a very good habit to get into. Teching on-stage allows you to roll by adding a direction (Control Stick). Helpful to escape combos and to survive stage spikes.
- Shieldgrab: Pressing attack (A) while in shield (holding L or R) initiates a grab. Use as a counter to a person attacking your shield.

- Command Grab: A move that also grabs. eg. Ganondorf, Mewtwo, or Diddy Kong’s Side-B.
- Cooldown/Endlag: All moves have a period of time when they are finishing their animation, and often do not have an active hitbox for this time, thus making the character vulnerable. This is the cooldown, or endlag of a move. Some moves have longer cooldown than others, try not to use moves that have a lot of endlag unless you’re sure they will connect.
- Punish: Taking advantage of an opponent’s mistake. When an opponent uses a move that has a long cooldown, this is where you have a window of time to punish them for missing.
- Approach: Getting closer to the opponent. Safely approaching is much more complicated, the safest approaches happen when you’re going for a punish.
- Read: Knowing what your opponent is going to do before they do it, usually reads come from observations of play patterns a player repeats. This goes both ways and is much more complicated than this simple explanation. But here is a GIF showing an attempt at a read. Ike gets thrown up in the air, and sees Roy charging his Fsmash. In an attempt to read Roy’s strike, he counters while falling. The Roy patiently waits until his smash uses itself, and waits out the counter’s active frames.

- Option: This goes hand in hand with reading. At any moment, you always have several options. An easy way of looking at this is looking at the options someone has while in shield. They can drop their shield, spot-dodge, roll left or right, or grab. Often lower level players will resort to using the same options repeatedly. eg: If an opponent is always rolling away when you run up on their shield, take note of that habit and next time you run up on their shield, anticipate their roll, and keep running to where the roll would end and punish. Or, eg: If a player always spot-dodges when you approach their shield, run up and charge a smash attack that’ll hit them when their invulnerability runs out. Again, a very brief explanation of this term.
- Mixup: Changing the way you do various actions. Mixing up approaches, combos, and recovery are basic but essential adaptations to your playstyle. Otherwise, you’ll get too predictable.
- DI (Directional Influence): Using the Control Stick to influence the trajectory you’re flying in. Can help you live longer, and can help you escape combos. I am working on a guide on how to correctly DI in the background.
- Pressure: any action that forces a player to react. Using projectiles a lot is a common way of pressuring the opponent to approach. Shield Pressure is when you continuously attack someone’s shield, forcing them to choose an option, at risk of a shield break.
- Spacing: positioning your character or placing your attacks in a way that keeps your character safe. Knowing the hitboxes of your moves and your opponents moves is crucial to learning how to properly space. Some characters rely on a heavy spacing game (Marth) moreso than other characters, but all characters must be conscious of spacing.
- Zoning: using your attacks, or the potential threat of your attacks, to limit your opponent’s spacing options.
- Neutral: the stage of the game where no character has the advantage, and players are usually looking for an opening either in the form of a punish or a read. Mastering the neutral is one of the most difficult parts of the game. Certain character have better options in neutral than others, usually in the form of projectiles.
Other Lingo
- Johns: An excuse. eg: Blaming a controller for your mistakes is known as “Controller Johns”.
- SD: Self-Destruct
- Misinput: Accidentally pressing the wrong button, or messing up the timing of a technique.
- Sakurai: The lead developer of smash. Often blamed for things.
- There are so many other terms here and there that commentators use to reference moves, eg. “The People’s Elbow” for Captain Falcon’s Fsmash. Someday I’ll provide a list of the one’s I’ve compiled, but for now – learn and observe!
Links/Sources
- Furil’s Smashboards Hitbox Visualization Thread: Not all characters have data yet, although Furil said he has plans to do more members of the cast when he has the time to. Definitely a great resource.
- This Kotaku Article by Yannick LeJacq: reference this to further understand the difference between Zoning and Spacing.
- Kurogane Hammer: A fantastic reference containing all of the Frame Data for characters.
– parson

One thought on “Sm4sh Lingo”